



Hello world!
Welcome to WordPress. This is your first post. Edit or delete it, then start writing!

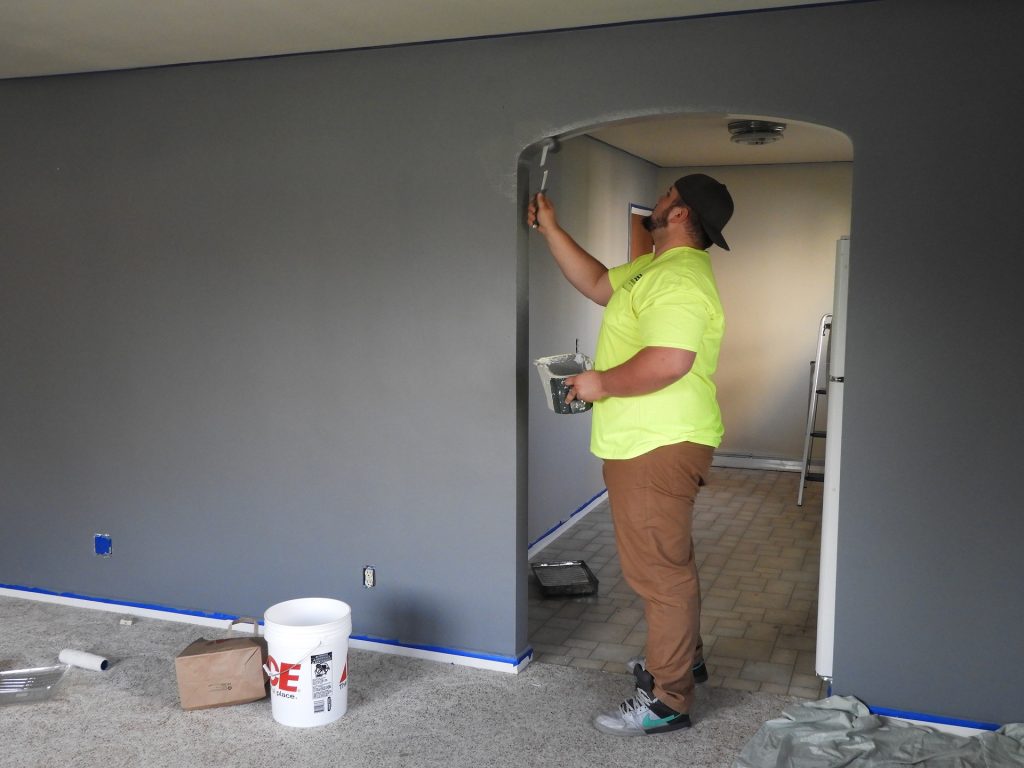



Lorem ipsum dolor sit amet, consectetuer adipiscing elit. Aenean commodo ligula eget dolor. Aenean massa. Cum sociis natoque penatibus et magnis dis parturient montes, nascetur ridiculus mus.





Lorem ipsum dolor sit amet, consectetuer adipiscing elit. Aenean commodo ligula eget dolor. Aenean massa. Cum sociis natoque penatibus et magnis dis parturient montes, nascetur ridiculus mus.
Lorem ipsum dolor sit amet, consectetuer adipiscing elit. Aenean commodo ligula eget dolor. Aenean massa. Cum sociis natoque penatibus et magnis dis parturient montes, nascetur ridiculus mus.
Lorem ipsum dolor sit amet, consectetuer adipiscing elit. Aenean commodo ligula eget dolor. Aenean massa. Cum sociis natoque penatibus et magnis dis parturient montes, nascetur ridiculus mus.
Welcome to WordPress. This is your first post. Edit or delete it, then start writing!

1. Protecting surfaces: Paint helps protect surfaces from damage caused by exposure to the elements such as moisture, sunlight, and humidity. It can also protect against wear and tear caused by regular use.
2. Enhancing appearance: Paint can be used to enhance the appearance of surfaces, making them look more attractive and visually appealing. It can be used to create a variety of looks, from bright and bold to subdued or natural.
3. Increasing value: A properly painted surface can increase the value of a property or item, making it more attractive to potential buyers or customers.
4. Concealing imperfections: Paint can be used to cover up imperfections or flaws in surfaces, such as cracks, stains, or uneven textures.
5. Preventing rust and corrosion: Paint can help prevent rust and corrosion on metal surfaces, which can extend the life of the item or structure.
Overall, paint is an essential material that has a wide range of uses in various industries and applications.
There are several types of paints available for metal surfaces, including:
1. Oil-based paints: These are traditional paints that are made with a base of oil and take a long time to dry. They are highly durable and provide excellent protection against rust and corrosion.
2. Solvent based Acrylic paints: These paints are and dry quickly. They are easy to apply and offer great adhesion, making them ideal for use on metal surfaces.
3. Epoxy paints: Epoxy paints are a type of resin-based paint that provides excellent adhesion and durability, making them ideal for use on metal surfaces that need to withstand harsh environments.
4. Enamel paints: Enamel paints are highly durable and offer excellent protection against rust and corrosion. They are also highly resistant to stains and scratches.
They can be air drying or baking enamel known as Stoving paints.
5. P.U Paints: These are specialized paints that are designed to provide extra protection against rust and corrosion. They offer UV protection as well.
When choosing a paint for metal surfaces, it is important to consider the type of metal you are painting, the environment it will be in, and the level of protection required. Always consult with a professional or follow the manufacturer’s instructions for proper preparation and application techniques.
Water-based paints, also known as latex or acrylic paints, are popular choices for both interior and exterior applications due to their ease of use, low odor, and environmental friendliness.
They uses water for thinner and hence eco friendly. Here are some common types of water-based paints:
1. Latex Paint: Latex paint is a general term used for water-based paints that use synthetic polymers as binders. It is known for its quick drying time, easy clean-up with water, and good durability. Latex paint is widely used for interior walls, ceilings, and woodwork.
2. Acrylic Paint: Acrylic paint is a type of water-based paint that uses acrylic polymers as binders. It is highly versatile and can be used on various surfaces, including canvas, paper, wood, and ceramics. Acrylic paints are known for their fast drying time, vibrant colors, and flexibility when dry. They can be used in interior as well as exterior walls.
They can be semi acrylic paints and pure acrylic paints.
1. Preparation:
– Ensure the surface to be painted is clean, dry, and free from dust, dirt, grease, and loose particles.
– If necessary, repair any cracks, holes, or damaged areas and allow them to dry and cure before painting.
– Protect surrounding areas by using drop cloths, painter’s tape, and plastic sheets.
2. Surface Priming (if required):
– Apply a suitable primer to the surface, especially if you’re painting a porous or previously unpainted surface.
– Priming helps improve adhesion, seals the surface, and provides a consistent base for the paint.
3. Paint Selection:
– Choose the appropriate type and quality of paint for the specific surface and the desired finish.
– Consider factors like the type of paint (oil-based, latex, acrylic, etc.), the sheen level (flat, eggshell, satin, gloss), and the color.
4. Paint Application:
– Stir the paint thoroughly to ensure an even consistency. If needed, thin the paint according to the manufacturer’s instructions.
– Use a brush, roller, or sprayer based on the type of surface and the desired finish.
– Start with cutting in the edges and corners using a brush, and then fill in the larger areas with a roller or sprayer for efficiency.
– Apply the paint evenly, using smooth and consistent strokes or spray patterns, working in manageable sections.
– Allow the first coat to dry completely as per the manufacturer’s instructions. Apply additional coats if necessary, allowing each coat to dry before the next.
5. Cleanup:
– Clean brushes, rollers, sprayers, and other painting tools according to the paint manufacturer’s instructions, using appropriate solvents or water.
– Properly dispose of any unused paint or empty paint cans according to local regulations.
It’s important to note that specific painting procedures may vary depending on the type of surface, the paint product being used, and any specific instructions provided by the paint manufacturer. Always refer to the paint product labels and follow the manufacturer’s guidelines for the best results.
Paint and primer are two different substances used in the process of painting surfaces. Here are the main differences between paint and primer:
1. Purpose: Primer is designed to prepare and prime the surface before painting, while paint is used to provide color, protection, and finish to the surface.
2. Application: Primer is generally applied as the first coat on bare surfaces, such as drywall, wood, or metal. It helps in sealing the surface, filling in pores, covering imperfections, and promoting better adhesion for the subsequent layers of paint. Paint is applied on top of the primer once the surface has been adequately prepared.
3. Color: Primers are usually white or light gray, although there are also tinted primers available. This light color helps to provide a neutral base for the paint color, allowing it to appear more vibrant and true to its intended hue. Paint, on the other hand, comes in a wide range of colors and finishes.
4. Functionality: Primer serves as a bonding agent between the surface and the paint, ensuring proper adhesion and reducing issues like peeling, blistering, or flaking. It also helps in preventing stains, blocking odors, and improving the coverage and longevity of the paint job. Paint, besides adding color, offers protection against environmental factors, such as UV rays, moisture, and general wear and tear.
In summary, primer is a preparatory coating used to enhance adhesion and create a smooth surface, while paint adds color, protection, and aesthetic appeal to the surface.
Check local regulations for proper paint disposal methods. Empty paint cans can often be recycled, while leftover paint may need to be taken to a hazardous waste facility. Avoid pouring paint down drains or into the environment.
When it comes to choosing the application type for painting, there are a few factors to consider. The application type refers to the method or technique used to apply paint to the surface. Here are some considerations to help you choose the appropriate application type:
1. Surface Type: Consider the material and texture of the surface you are painting. Different surfaces may require specific application methods to achieve optimal results. For example, smooth surfaces like walls or cabinets can be effectively painted using methods such as rolling or spraying, while textured surfaces like stucco or brick may require techniques like brushing or stippling.
2. Project Size and Scope: The size and scope of your painting project can influence the choice of application type. For large-scale projects, such as painting entire rooms or exteriors, methods like rolling or spraying are generally more efficient and time-saving. Smaller projects, like touch-ups or detailed work, may benefit from brushing or using smaller applicators.
3. Paint Type: Consider the type of paint you are using. Different types of paint, such as latex, oil-based, or specialty finishes, may have specific application recommendations. Consult the paint manufacturer’s guidelines to determine the recommended application methods for the specific paint you are using.
4. Desired Finish: The finish you want to achieve can also impact the application type. Different application methods can result in different finishes, such as smooth, textured, or even patterns. For example, rolling generally provides a smooth finish, while brushing can create texture or subtle brush strokes. Spraying can result in a fine, even finish or a textured look, depending on the technique and equipment used.
5. Experience and Skill Level: Consider your experience and comfort level with different application techniques. Some methods may require more skill or practice to achieve desired results. Choose an application type that matches your skill level and allows you to work comfortably and confidently.
6. Tools and Equipment Availability: Take into account the tools and equipment you have access to. Different application methods require specific tools such as brushes, rollers, sprayers, or sponges. Ensure you have the necessary equipment for your chosen application type or be willing to invest in or rent the appropriate tools.
7. Time and Cleanup Considerations: Consider the time and effort required for each application method, as well as the cleanup involved. Some techniques, like rolling or spraying, may be faster but require more extensive cleanup. Brushing may take longer but be easier to clean up. Take these factors into account when choosing the application type based on your preferences and available resources.
It’s worth noting that you can also combine different application types within a single project. For example, you might use a roller for larger areas and a brush for cutting in or detailed work.
By considering these factors and weighing the pros and cons of each application type, you can choose the method that best suits your project’s needs and helps you achieve the desired results.
We always make sure to make our product consistant and free from error however if you have any feedback or complain you can write us on mailid : prolinepaints22@gmail.com
There are various types of spray machines available for different painting applications. Here are some common types of spray machines:
1. Airless Paint Sprayer: Airless sprayers use a high-pressure pump to atomize the paint and propel it onto the surface. They are versatile and suitable for both indoor and outdoor projects. Airless sprayers are efficient for large areas and can handle a wide range of coating materials, from thin stains to thick latex paints.
2. HVLP Paint Sprayer: HVLP (high-volume, low-pressure) sprayers operate at lower pressure compared to airless sprayers. They use a high volume of air to atomize the paint, resulting in reduced overspray and a softer finish. HVLP sprayers are ideal for fine finishes, precision work, and projects that require minimal overspray.
3. LVLP Paint Sprayer: LVLP (low-volume, low-pressure) sprayers operate at even lower pressure and consume less air compared to HVLP sprayers. They provide greater control and reduced overspray, making them suitable for small-scale projects, touch-ups, or detailed work.
4. Compressed Air Sprayer: Compressed air sprayers use an air compressor to atomize the paint. They are often used for automotive painting or in professional painting applications. These sprayers offer precise control but can generate more overspray compared to HVLP or airless sprayers.
5. Electrostatic Sprayer: Electrostatic sprayers apply an electrical charge to the paint particles as they leave the gun, causing them to be attracted to the surface. This technology reduces overspray and improves paint transfer efficiency. Electrostatic sprayers are commonly used in industrial or commercial settings.
6. Texture Sprayer: Texture sprayers are designed specifically for applying textured coatings such as popcorn or orange peel textures. They can handle thicker materials and produce a textured finish on walls or ceilings.
7. Fine Finish Sprayer: Fine finish sprayers are designed for achieving smooth, high-quality finishes. They are commonly used for cabinetry, furniture, or trim work, where a flawless finish is desired. These sprayers are often HVLP or LVLP systems optimized for precise application.
8. Automotive Paint Sprayer: Automotive paint sprayers are specialized tools for applying automotive paints and coatings. They are designed to handle specific paint formulations and provide professional-quality finishes for automotive projects.
It’s important to note that the availability and specific features of spray machines can vary across brands and models. When selecting a spray machine, consider the type of project, the desired finish, the paint or coating being used, and your level of experience. Research different models, read reviews, and consult with experts or professionals to choose the most suitable spray machine for your specific needs.
DFT stands for Dry Film Thickness, and it refers to the thickness of the paint film after it has dried and cured on a surface. It is an essential parameter in the field of painting and coatings as it directly influences the performance and durability of the paint system. Here’s why DFT is important:
1. Protection and Corrosion Resistance: The DFT of a paint film is directly related to its protective capabilities. A sufficient DFT ensures that the substrate is adequately shielded from environmental factors, such as moisture, UV radiation, chemicals, and physical wear. A thicker paint film can provide better corrosion resistance and protect the underlying surface from degradation.
2. Adhesion and Bonding Strength: The thickness of the paint film also influences the adhesion and bonding strength between the coating and the substrate. A proper DFT allows the paint to adhere well to the surface, preventing peeling, flaking, or blistering over time.
3. Appearance and Aesthetic Quality: The DFT can impact the visual appearance and aesthetic quality of the painted surface. A uniform and consistent DFT helps achieve a smooth and even finish, hiding imperfections and providing a visually pleasing appearance.
4. Paint Performance and Longevity: The performance and longevity of the paint system are closely linked to the DFT. Inadequate film thickness may result in premature coating failure, reduced protection, and shorter lifespan of the paint system. On the other hand, a proper DFT can enhance the durability and longevity of the coating, ensuring its performance over an extended period.
5. Compliance with Specifications and Standards: In many industries and applications, there are specific standards and specifications that dictate the required DFT for a given paint system. Meeting these requirements is crucial to ensure compliance, quality control, and regulatory adherence.
To measure the DFT, specialized tools such as paint thickness gauges or magnetic induction gauges are used. These instruments provide accurate readings of the paint film thickness, allowing painters and inspectors to verify if the applied coating meets the specified DFT.
In summary, the Dry Film Thickness (DFT) of a paint film is a critical parameter that affects protection, adhesion, appearance, and the overall performance and durability of the coating. Ensuring the proper DFT is achieved during application and adhering to specified requirements is essential for achieving a high-quality, long-lasting paint finish.
Applying 2-pack paints, also known as two-component paints or 2K paints, requires careful preparation and following specific application instructions. Here are the general steps to apply 2-pack paints:
Mixing the Components: 2-pack paints consist of two components: a base paint and a hardener or activator.Mix paint and hardener as per recommended mixing ratio. Follow the manufacturer’s instructions to mix the components in the correct ratio. Use a mixing stick or paddle to thoroughly blend the components until a homogeneous mixture is achieved. It’s important to mix only the amount of paint that can be used within the specified pot life, as 2-pack paints have a limited working time.
Curing and Drying: 2-pack paints require a curing process to achieve their full hardness and durability. After the final coat, allow the painted surface to dry and cure in a well-ventilated area at the recommended temperature and humidity conditions specified by the paint manufacturer.
The amount of thinner to be added before painting depends on several factors, including the type of paint, the specific product instructions, the desired viscosity, and the application method. It’s essential to follow the manufacturer’s recommendations for the specific paint product you are using, as they will provide the most accurate guidance. However, here are some general guidelines:
1. Read the Product Instructions: Carefully review the product instructions provided by the paint manufacturer. They should include specific recommendations for thinning the paint if necessary. Follow those instructions as they take into account the unique properties and requirements of the paint product.
2. Test and Adjust: Conduct a small test before proceeding with the full application. Mix a small amount of paint with a small amount of thinner according to the manufacturer’s recommendations. Apply the test mixture to a sample surface or a test panel. Observe the consistency, coverage, and drying characteristics. If needed, adjust the ratio of paint to thinner based on the test results.
3. Gradual Thinning: When adding thinner, it’s generally recommended to do so gradually. Add small amounts of thinner at a time and mix thoroughly. Continuously evaluate the viscosity and flow of the paint. This gradual approach helps prevent over-thinning, allowing you to achieve the desired consistency without compromising the quality of the paint.
4. Application Method Consideration: Different application methods may require different viscosities of paint. For example, spraying usually requires a thinner consistency compared to brushing or rolling. Consider the application method you will be using and any specific guidelines provided by the paint manufacturer.
5. Desired Results: The amount of thinner to add also depends on the desired results. Thinning the paint can affect coverage, opacity, drying time, and finish. Consider your specific requirements and preferences for the project, such as a smoother finish or better flow and leveling, when determining the amount of thinner to add.
When selecting a paint color, consider the room’s lighting, size, purpose, and desired ambiance. Test paint samples on the wall to see how they look in different lighting conditions before making a final decision.
The amount of paint needed depends on the surface area to be covered and the paint’s coverage rate. Measure the dimensions of the walls or surfaces and consult the paint can’s coverage information to calculate the required amount.
Common painting tools include paintbrushes, rollers, paint trays, drop cloths, painter’s tape, putty knives, sandpaper, and cleaning supplies. The specific tools needed may vary depending on the project and application method.
Techniques for achieving a smooth finish include using high-quality brushes or rollers, properly thinning the paint if needed, applying thin coats, and avoiding overworking the paint. Sanding between coats can also help achieve a smoother surface.
Drying time varies depending on the type of paint, environmental conditions (temperature, humidity), and the thickness of the applied coat. Typically, latex paint dries to the touch within a few hours, while oil-based paint may take longer to dry.
Regular cleaning with a mild detergent and soft cloth is usually sufficient for painted surfaces. Avoid abrasive cleaners or scrubbing vigorously. Touch-up painting may be required for any damaged or worn areas.